Modbus Monitor - Modbus Console
Mobile Modbus monitoring for field technicians and engineers
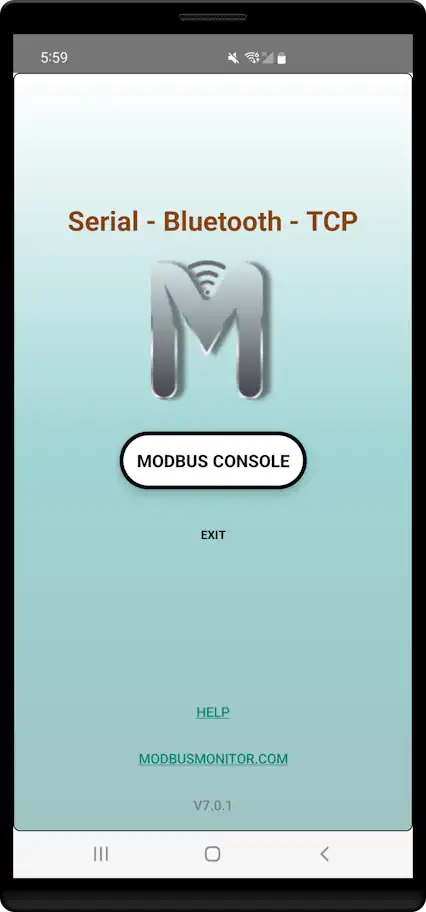
Free Version
Modbus Console is the free version of Modbus Monitor for Android devices. For advanced features, see the Advanced Guide.
Overview
The free Modbus Monitor Android app provides essential Modbus monitoring capabilities on mobile devices. The Terminal Console provides a clean, field-based interface to read and write data without memorizing complex address strings.
Perfect for:
- Field technicians doing quick device checks
- Students learning Modbus protocols
- Automation engineers troubleshooting systems
- Basic industrial monitoring and diagnostics
Features
Core Capabilities:
- Modbus TCP - Network connections (WiFi/Ethernet) using Modbus/TCP protocol
- Bluetooth & BLE - Wireless connections using Modbus RTU protocol
- USB Serial - Direct cable connections using Modbus RTU protocol
- Form-based interface - Simple fill-in fields, no complex syntax
- Read/write operations - Single and multiple registers
Connection Diagrams
Wireless Connections (Bluetooth/WiFi)
flowchart LR
    A[Modbus Monitor<br/>Android App] <-->|Bluetooth Classic<br/>BLE<br/>WiFi| B[Built-in<br/>Bluetooth/WiFi Chip]
    B <--> C[PLC/Modbus Device<br/>with Bluetooth/WiFi]

    style A fill:#d4edda
    style B fill:#fff3cd
    style C fill:#e1f5ff
Serial Connections (RS232/RS485)
flowchart LR
    A[Modbus Monitor<br/>Android Device] <-->|USB-C/Micro USB| B[USB-OTG<br/>Adapter]
    B <-->|USB| C[USB-Serial<br/>Converter]
    C <-->|RS232/RS485| D[PLC or<br/>Modbus RTU Server]

    style A fill:#d4edda
    style B fill:#ffeaa7
    style C fill:#fff3cd
    style D fill:#e1f5ff
Need More Protocol Combinations?
Looking for additional protocol combinations like Modbus RTU over TCP or Modbus ASCII over TCP? Check out the Modbus Monitor Advanced version for enhanced protocol flexibility and professional features.
Quick Start
Step 1: Launch the Application
- Download from Google Play Store
- Press "Modbus Console" to begin
- Grant permissions when prompted:
For Bluetooth connections:
- Android requires location permission (depending on OS version)
- Allow Modbus Monitor to find, connect to, and determine relative position of nearby devices (click "Yes")
- Skip Bluetooth permissions if only using TCP (click "No")
For USB Serial connections:
- Requires USB-to-Serial port via USB-OTG connection
- "Open Modbus Monitor to handle FT232 USB UART?" (click "OK")
- "Always open Modbus Monitor when FT232 USB UART is connected?" (click "OK")
Step 2: Select Communication Channel
The app displays available communication channels in the list:
- Modbus TCP (always first) - For network connections
- Bluetooth Paired Devices - Previously paired BT devices
- Serial Devices - Connected USB serial ports (when found)
- Bluetooth Classic - Connect to Bluetooth SPP (Serial Port Profile) devices
- BLE Devices - Bluetooth Low Energy devices (when found)
Protocol Selection
- Modbus TCP channel -> Uses Modbus TCP protocol
- All other channels -> Use Modbus RTU protocol
Step 3: Configure Your Connection
Click the three-dot menu (...) in the top-right corner to configure IP/Port (for TCP) or Baud Rate/Parity (for Serial).
For Modbus TCP:
- IP Address - Remote server IP address
- Port - Usually 502 (default Modbus port)
For Serial Connections:
- Baud Rate - Communication speed (9600, 19200, etc.)
- Data Bits - Usually 8
- Parity - None, Even, or Odd
- Stop Bits - Usually 1
For Bluetooth Classic (SPP):
- Pair device first in Android Bluetooth settings
- Older Bluetooth SPP devices require pairing before use
- Once paired, select from "Bluetooth Paired Devices" list in app
- Configure serial parameters (baud rate, parity) in app settings
For BLE (Bluetooth Low Energy):
- No pre-pairing required - BLE devices can be discovered and connected directly
- Scan and connect directly from within Modbus Monitor app
- Select from "BLE Devices" list
- BLE offers easier setup for newer devices
Using the Terminal Console
The Terminal Console is designed for simplicity. Instead of typing long command strings, you simply fill in the fields.
Interface Controls
| Field | Description |
|---|---|
| Device Address | The Station ID (Slave ID) of the target device (1 - 247). |
| Function | Select the Modbus function (e.g., Read Holding Registers, Write Single Coil). |
| Register | The 1-based register address (e.g., 1 for the first register). |
| Qty | The number of registers/coils to read. |
| Value (write) | The value to send when performing a Write operation. |
Screenshot Placeholder
[Image showing Terminal Console interface with labeled fields will be added here]
Reading Data

To read data from a device:
- Device Address: Enter the Slave ID (default is 1).
- Function: Select a "Read" function from the dropdown (e.g., 03 Read Holding Registers).
- Register: Enter the starting register number (e.g., 100).
- Qty: Enter the number of registers to read (e.g., 1 or 10).
- Action: Tap the READ button.
The response will appear in the large text area at the top of the screen.
Example: Reading temperature from register 100
- Device Address:
1 - Function:
03 Read Holding Registers - Register:
100 - Qty:
1 - Tap READ
Writing Data
To write data to a device:
- Device Address: Enter the Slave ID.
- Function: Select a "Write" function (e.g., 06 Write Single Register).
- Register: Enter the target register number.
- Value (write): Enter the numeric value you wish to send.
- Action: Tap the WRITE button.
Example: Writing value 551 to register 1
- Device Address:
1 - Function:
06 Write Single Register - Register:
1 - Value (write):
551 - Tap WRITE
Clearing the Screen
If the response area becomes too cluttered, tap the CLEAR button to wipe the history.
Understanding Modbus Addresses
The app automatically calculates the 6-digit address for you based on the Function and Register you select. You will see this displayed in blue text below the input fields (e.g., 6-digit address: 400001).
Address Format Breakdown
Example: 400001 breaks down as:
- 4 = Register Type Indicator (Holding Register)
- 00001 = Register Number (1)
Auto-Calculated for You
You don't need to manually calculate 6-digit addresses anymore! The Terminal Console does this automatically based on your Function and Register selections.
Register Type Reference:
| Prefix | Register Type | Auto Function Code | Address Range | Access |
|---|---|---|---|---|
| 0 | Coils | FC01 (Read) / FC05 (Write) | 000001-065536 | Read/Write |
| 1 | Discrete Inputs | FC02 (Read) | 100001-165536 | Read Only |
| 3 | Input Registers | FC04 (Read) | 300001-365536 | Read Only |
| 4 | Holding Registers | FC03 (Read) / FC06 (Write) | 400001-465536 | Read/Write |
Common Address Examples:
| Address | Meaning | Use Case |
|---|---|---|
400001 |
1st holding register | Temperature setpoint |
400025 |
25th holding register | Pressure control value |
300001 |
1st input register | Temperature sensor reading |
300010 |
10th input register | Flow rate measurement |
000001 |
1st coil | Motor start/stop control |
100001 |
1st discrete input | Emergency stop status |
Complete Address Guide
For detailed explanations, conversion from other tools, troubleshooting, and advanced topics:
📖 6-Digit Addressing Scheme Guide - Complete reference with examples, device compatibility, and common mistakes to avoid
Additional Resources: - Modbus Monitor YouTube Channel - Wikipedia Modbus Article
Troubleshooting
Connection Issues
Cannot connect to device: - Verify IP address and port settings - Check network connectivity - Ensure device supports Modbus TCP/RTU - Confirm device is powered and accessible
Bluetooth pairing problems: - Pair device in Android settings first - Ensure device is in pairing mode - Check Bluetooth is enabled on both devices
Communication Errors
No response from device: - Verify Device Address (Station ID) is correct - Check communication parameters (baud rate, parity, etc.) - Ensure correct protocol (TCP vs RTU) - Test with known-good Modbus client
Address errors: - Verify the Function code supports your operation - Check device documentation for supported addresses - Ensure Register number is within device's supported range
Advanced Tips
Efficient Monitoring
- Use multiple reads - Set Qty to 10 or more to read multiple registers at once
- Monitor key registers that indicate system status
- Document working configurations - Note Device Address, Function, and Register numbers
Best Practices
- Start with simple reads - Use Function 03 or 04 to verify communication
- Test with manufacturer examples when available
- Keep notes of working Device/Register combinations for different devices
- Use the helper tips displayed at the bottom of the Terminal Console
Getting the App
Upgrade Path
Ready for more features? The Advanced Version includes:
- Unlimited monitor points
- Serial/RTU support
- Advanced data analysis
- Professional reporting
- Priority support
Support
- App Store Reviews - Rate and review on Google Play
- Community Forum - Ask questions and share tips
- Basic Support - Email support for critical issues
This free version is perfect for getting started with mobile Modbus monitoring. Upgrade when you need advanced features for professional use.